Flooring Contractors Near Me: A Step-by-Step Guide to Hiring the Right Installer
Published May 21, 2026 • Estimated read time: 11–14 minutes
Learn how to find reputable local flooring pros, compare estimates fairly, and make sure your new floors look great and last for years.
Searching for “flooring contractors near me” is easy. Hiring the right one—at the right price, with the right scope—takes a bit more intention. Flooring is a finish you look at every day, and small shortcuts during prep (moisture testing, leveling, transitions, underlayment) can turn into big regrets later: squeaks, gaps, loose planks, cracked grout, or an expensive redo.
This guide walks you through a practical process to shortlist local installers, ask the right questions, compare quotes apples-to-apples, and spot red flags early. Whether you’re installing hardwood, luxury vinyl plank (LVP), tile, or carpet, the goal is the same: a clean, durable install that matches the estimate.
The big idea
Great flooring outcomes come from three things working together: the right product, the right prep, and the right installer. If any one of those is weak, you’ll feel it in the first 6–18 months.
What a Flooring Contractor Does (and When You Need One)
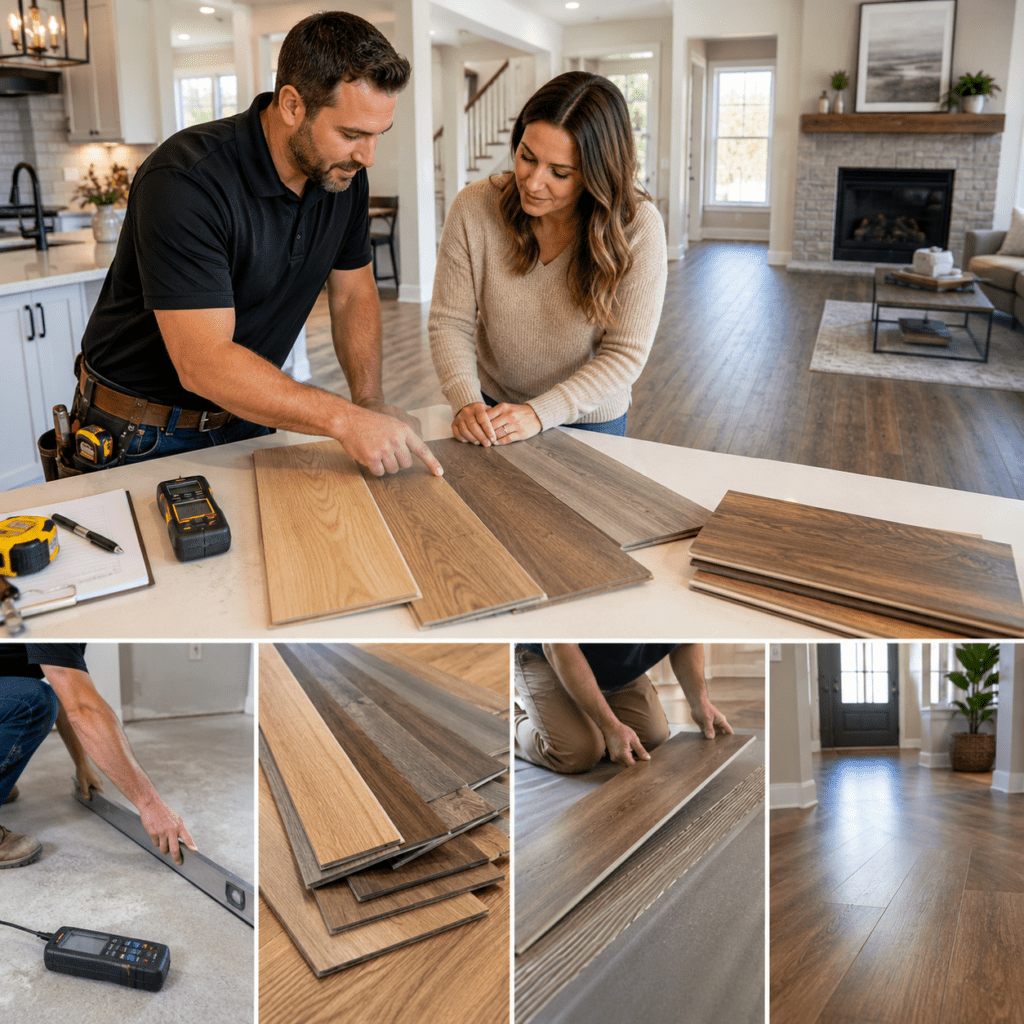
A flooring contractor isn’t just someone who “puts the new stuff down.” The best installers act like problem-solvers: they look at your home’s conditions, anticipate what could fail, and build a plan that protects both the floor and your budget.
- Evaluates your space, recommends materials, and confirms the subfloor and moisture conditions are suitable for installation.
- Handles prep work like leveling, underlayment selection, moisture barriers, and transitions that strongly impact durability and appearance.
- Coordinates the project—timeline, debris disposal, and details like baseboards, thresholds, stair noses, and clean edges.
- Helps protect warranties, especially when manufacturers require certified installation or documented moisture testing.
When a pro is usually worth it
DIY can be realistic for small, square rooms with a clean subfloor and click-lock products—if you have time, patience, and the right tools. In many real homes, the “simple install” becomes complicated fast. You’ll typically want a professional contractor for:
- Large areas (open concepts amplify layout mistakes and lippage).
- Stairs (nosing details, safety, and precision cuts matter).
- Uneven subfloors (common in older homes).
- Radiant heat systems (method and compatible materials are critical).
- Moisture-prone spaces (basements, slab-on-grade, entryways).
If an estimate seems “high,” ask what prep it includes. The most expensive floors to own are the ones installed twice.
How to Find Reliable Flooring Contractors Near You
“Near me” should mean more than distance. You want a contractor who can respond quickly, stands behind their work, and has local context (typical subfloor types, humidity patterns, common slab moisture issues, and what products hold up well in your area).
A practical shortlist method
- Start with local search + map listings, then shortlist contractors who clearly state the flooring types they install (hardwood, LVP, tile, carpet) and the service area.
- Read reviews for patterns: punctuality, cleanliness, communication, and how issues were handled—not just star ratings.
- Get referral “shortcuts” by asking neighbors, realtors, property managers, or local hardware/flooring stores who they trust.
- Verify they’re real: physical address (or a clearly established service area), a professional estimate process, and willingness to do an on-site measure.
What to look for in reviews (beyond stars)
A five-star rating with vague praise (“Great job!”) is less useful than detailed feedback. High-quality reviews often mention:
- Prep work (leveling, moisture barriers, squeak fixes, clean transitions).
- Communication (who updates you, how quickly, and how change orders are handled).
- Jobsite habits (dust control, protecting walls, daily cleanup).
- Accuracy (final invoice matches quote; clear explanations for any additions).
- Aftercare (warranty response, punch-list follow-through).
Quick filter
Prefer installers who do on-site measurements and provide a written scope. A vague phone quote is rarely accurate because flooring cost is heavily driven by prep, layout complexity, and trim/transition work.
Questions to Ask Before Hiring (Use This Checklist)
The goal of your questions isn’t to interrogate anyone—it’s to reveal how they think. Strong contractors explain trade-offs clearly and document assumptions. If answers are defensive, rushed, or vague, treat that as data.
Scope, prep, and “what happens if…”
- What subfloor prep is included? Ask how they handle leveling, squeaks, moisture issues, and damaged areas found during demolition.
- What’s your flatness target? This matters especially for LVP and large-format tile where small dips cause visible problems.
- How do you handle surprises? If they discover rot, mold, cracks, or high moisture, what’s the process and pricing?
- Who handles transitions and trim? Clarify baseboards, shoe molding, thresholds, stair noses, and doorway cuts.
Licensing, insurance, and accountability
- Can you provide proof of licensing and insurance? Specifically: general liability and workers’ comp.
- Who is responsible if someone is injured on my property? The answer should be clear, not hand-wavy.
- Who will be on site? Employees vs. subcontractors, and who supervises quality daily.
Product fit and manufacturer requirements
- What product do you recommend for my lifestyle? Pets, kids, wet areas, and heavy furniture change the best choice.
- Do you follow manufacturer specs? Ask about acclimation, moisture testing, adhesives, underlayment, and expansion gaps.
- What’s the plan for dye lots, shading, or pattern alignment? This is huge for hardwood variation, LVP batch differences, and tile layout.
Materials and overage (a hidden cost driver)
Flooring is often purchased with extra material for cuts, waste, and future repairs. Pros typically plan for overage—but the amount should be explained.
- Who purchases materials? If the contractor buys, ask how returns/refunds work for unopened boxes.
- What overage percentage are you using—and why? Straight rooms might be 5–10%; complex layouts can be more.
- What happens if we run short? You want a plan that doesn’t pause the job or force mismatched batches.
A professional quote should make you feel calmer, not more confused. If you don’t understand an item, ask them to show you where it applies in your home.
How to Compare Quotes Like a Pro (Apples-to-Apples)
The fastest way to overpay (or underbuy) is to compare only the total price. Flooring estimates can differ because each contractor assumes a different scope. Your job is to normalize those assumptions so you’re choosing the best value, not the best “looking number.”
Use a line-by-line comparison sheet
Ask each contractor to confirm (in writing) whether these items are included, excluded, or “allowanced” (estimated and subject to change):
| Line item | What to confirm |
|---|---|
| Demolition & removal | Old floor removal method, disposal/hauling, and whether adhesives/staples are included. |
| Subfloor inspection & repair | Rot/soft spots, patching, squeaks, fasteners, and repair limits (square footage or time allowances). |
| Leveling & flatness | Self-leveling compound vs. patching; flatness target and how it’s measured. |
| Moisture testing/mitigation | Testing method, documentation, vapor barrier needs, and mitigation options if readings are high. |
| Underlayment & sound control | Product name/specs, thickness, and whether it meets building/HOA requirements. |
| Transitions & trim | Thresholds, stair noses, reducers, quarter-round/shoe molding, caulking, and paint touch-ups. |
| Furniture moving | What is included, what is excluded, and who disassembles/reassembles items. |
| Cleanup & protection | Dust control, wall protection, daily cleanup, and final haul-away. |
| Warranty | Separate product vs. workmanship warranty; response process; what voids coverage. |
Verify the materials aren’t being “swapped”
Two bids can look similar—until you zoom in on the product specs. Make sure the estimate states the exact brand/line and key performance details:
- LVP: wear layer thickness, core type, attached pad specs, and whether a moisture barrier is included.
- Hardwood: solid vs. engineered, thickness, finish type, installation method (nail/glue/float), and moisture testing approach.
- Tile: substrate system, mortar type, grout type (sanded/unsanded/epoxy), and movement joints.
- Carpet: pad density/thickness, seam placement, and power stretching method.
Timeline and crew size matter more than you think
Faster isn’t always better. A rushed layout or skipped acclimation can show up as uneven seams, gaps, lippage, and weak edges. Ask:
- How many installers will be on site each day?
- How many days is the install, and what might extend it (dry times, leveling cures, acclimation, backorders)?
- How are issues documented and approved before extra work is done?
Payment terms: protect yourself without being difficult
A reasonable deposit is common—especially for special-order materials—but avoid paying the full amount upfront. Safer structures include:
- Deposit to schedule and order materials.
- Progress payment after demolition and prep are complete.
- Final payment after walkthrough and punch list completion.
Decision tip
If one quote is dramatically lower, assume something is missing until proven otherwise. The most common omissions are subfloor leveling, moisture mitigation, and trim/transition labor.
Red Flags and Common Flooring Scams to Avoid
Most contractors are legitimate, but flooring is a high-ticket home improvement category where “fast talk + low bid” can pressure homeowners into bad decisions. Use these red flags as a screening tool.
Estimate and contract red flags
- Refuses a written estimate or won’t provide a clear scope of work.
- Pressures you with a “today only” discount or demands an on-the-spot signature.
- Won’t specify product details (brand/line, underlayment type, or installation method).
- Has vague language like “prep as needed” without defining limits or pricing.
Pricing traps to watch for
- Very low bids that exclude prep work or plan to recover margin through change orders.
- Unrealistic timelines that ignore acclimation and cure times.
- Cash-only demands or unusual payment schedules.
Warranty and blame-shifting
Be careful if a contractor says, “The manufacturer warranty will cover it,” while also minimizing workmanship coverage. In many cases, product warranties don’t cover installation errors, moisture failures, or improper prep.
If communication is inconsistent during the estimate stage, it often gets worse during the project—exactly when you need updates on delays and decisions.
What the Installation Process Typically Looks Like
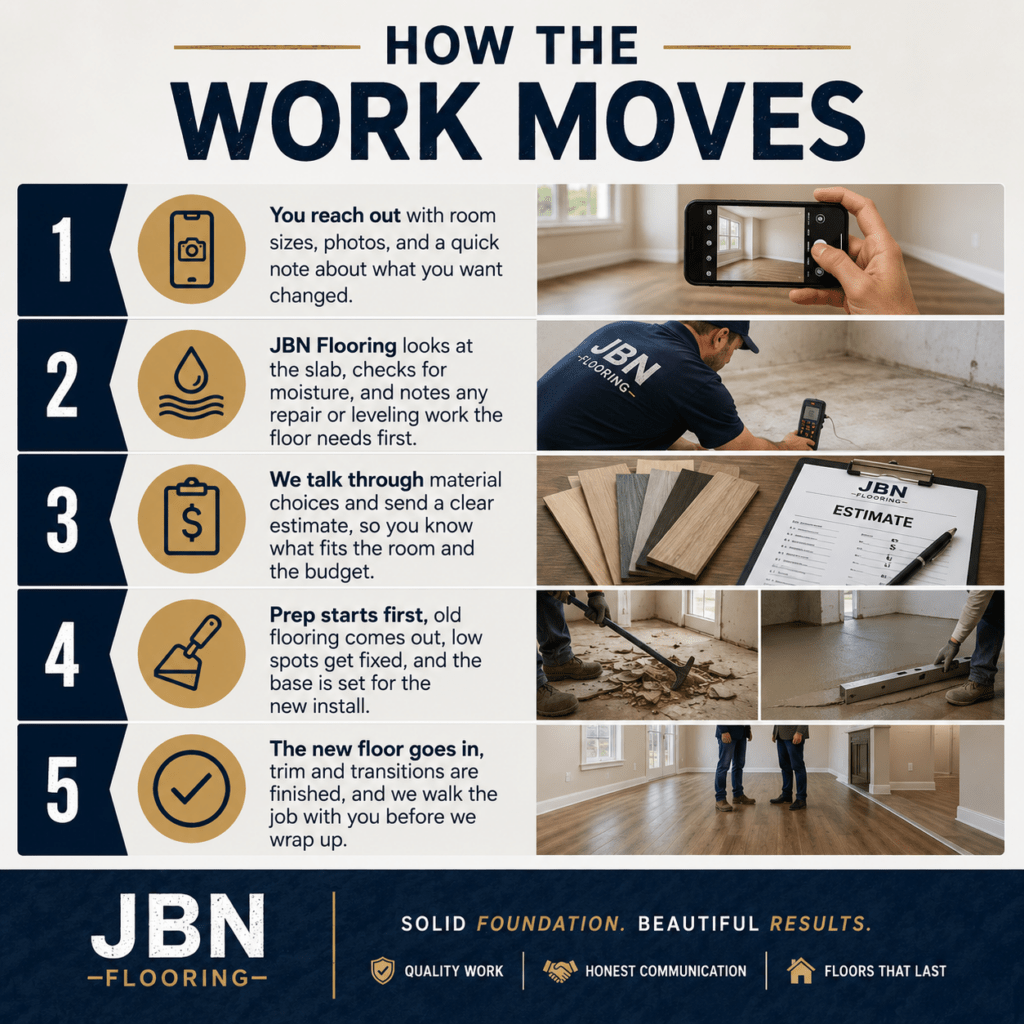
Knowing the basic flow helps you evaluate whether an installer’s timeline is realistic and whether they’re skipping steps. While every project differs, most professional installs follow a consistent sequence.
1) Protection, demolition, and removal
The crew protects adjacent surfaces (walls, cabinets, vents), then removes the old flooring and addresses leftover adhesives, staples, tack strips, or thinset. Clean demolition matters: poor removal can damage the subfloor and create extra leveling work later.
2) Subfloor inspection and corrections
This is where long-term durability is decided. Contractors check for squeaks, delamination, dips/high spots, moisture, and structural issues. Fixes may include patching, sanding, re-fastening, or applying leveling compound. On slabs, a vapor barrier or mitigation system may be required.
3) Acclimation (when required)
Many products—especially wood—need time to adjust to your home’s temperature and humidity. Skipping acclimation can lead to expansion/contraction problems such as gapping, cupping, or buckling.
4) Layout planning and installation
Pros plan the layout so seams, patterns, and thresholds land in visually balanced spots. This includes planning around: hallways, doorways, kitchen runs, stair landings, and transitions between flooring types.
5) Finish work, cleanup, and walkthrough
Final steps include trim and transitions, cleanup, and a walkthrough punch list. You should also receive guidance on cure times (for adhesives/grout), furniture return timing, and cleaning products that won’t damage the finish.
Walkthrough checklist
- Edges: tight, clean cuts; no obvious gaps at walls or transitions.
- Flatness: no rocking planks, hollow spots, or tile lippage you can feel underfoot.
- Details: stair noses secure; thresholds flush; trim consistent.
- Finish: no adhesive haze, grout smears, or damaged boards left in place.
- Paperwork: warranty terms, care instructions, and any product documentation.
Flooring Type Matters: Hiring Tips by Material
“Flooring installer” is a broad label. Many crews specialize, and the best questions depend on the material. Use the prompts below to confirm your contractor has real experience with your specific product.
Hardwood (solid or engineered)
Hardwood rewards craftsmanship and punishes shortcuts. Your installer should be fluent in moisture testing and acclimation and able to explain why they’re choosing nail-down, glue-down, or floating installation for your home.
- How do you document moisture testing for the subfloor and wood?
- What’s your approach to acclimation, and how long will it take?
- How do you handle expansion gaps and transitions at doorways?
- What conditions would make you recommend engineered over solid (or vice versa)?
Luxury Vinyl Plank (LVP)
LVP can be extremely durable, but it’s less forgiving of subfloor flatness than many homeowners expect. Small dips and high spots can telegraph through or stress click-lock joints.
- What flatness standard do you install to, and how do you correct deviations?
- Will you use an underlayment or vapor barrier, and is it compatible with the product?
- How do you finish edges and transitions so they don’t lift over time?
- What’s your plan for heavy furniture and rolling loads (chairs, islands, pianos)?
Tile (ceramic, porcelain, stone)
Tile failures are often substrate failures. The right underlayment system, movement joints, and flatness prep make the difference between a showroom finish and cracks.
- What substrate system will you use (cement board, uncoupling membrane), and why?
- Which mortar and trowel size are specified for my tile format?
- How do you prevent lippage, especially with large-format tile?
- Where will you place movement joints, and how will transitions be handled?
Carpet
Carpet comfort and longevity depend heavily on pad selection and stretching technique. Good installers can explain seam placement and how they prevent peaking or fraying.
- What pad density and thickness do you recommend for my traffic level?
- Do you use power stretching (not just knee-kicking) for larger rooms?
- Where will seams be placed to reduce visibility and wear?
- How will transitions be finished at tile/LVP/hardwood edges?
Conclusion: Hire with Clarity, Not Guesswork
The best way to find great flooring contractors near you is to slow down long enough to compare scopes, not just totals. Shortlist pros who measure on-site, document prep assumptions, specify materials clearly, and communicate like they’ll still be reachable after the final payment.
If you remember only a few things: confirm what prep is included, demand product specificity, avoid “too good to be true” pricing, and align payment milestones to progress. Your floors will look better on day one—and stay that way longer.
Ready to Hire a Flooring Contractor Near You?
Shortlist 3 local pros, request detailed on-site estimates, and use the questions above to choose an installer you can trust.
Want a simple next step? Copy this page’s checklist into your notes app, then schedule three on-site measurements this week. You’ll quickly see who is detailed, who is vague, and who deserves your project.
Request an On-Site Estimate