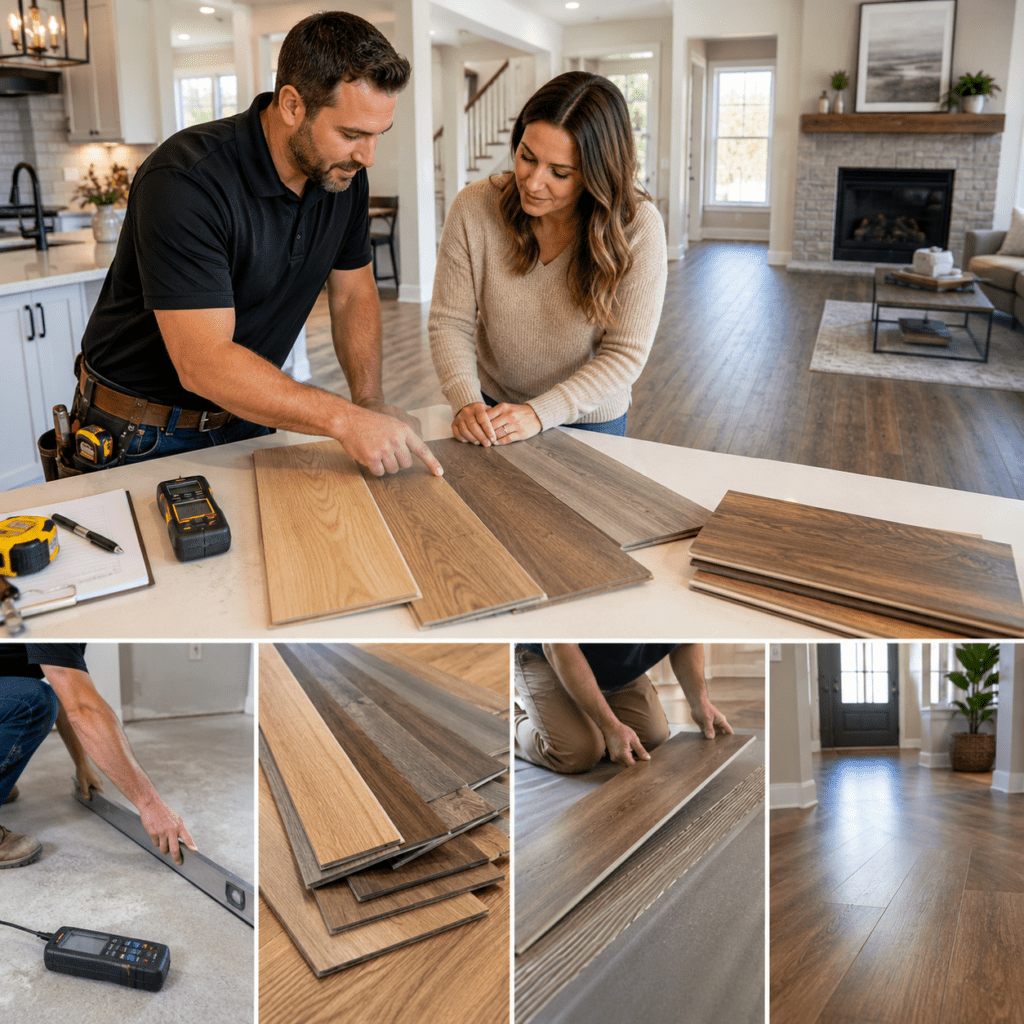

Floor replacement guide
5 Things You Never Knew About Replacing Floors: Hidden Costs, Prep, and Pro Tips
Before you pick a color or plank size, learn the behind-the-scenes factors that can make (or break) a flooring project—budget, timeline, and long-term performance.
Replacing floors looks straightforward from the outside: choose a material, pick a color, schedule the install. But most of the “success factors” live underneath and around the surface—subfloor conditions, moisture, room transitions, cure times, and the small finish details that determine whether your floor feels premium or patched together.
This guide walks through five commonly overlooked truths that affect nearly every flooring project—plus a practical checklist you can use before you sign off on an estimate. Whether you’re swapping carpet for a hard surface, updating worn-out planks, or renovating multiple rooms at once, these insights can save you money, prevent delays, and help your new floor hold up for years.

1) The subfloor matters more than the flooring you choose
It’s tempting to spend all your energy comparing surface options—LVP vs. hardwood, tile vs. laminate, plush carpet vs. low-pile. But the subfloor (and the prep that gets it installation-ready) is the foundation that determines how the floor will look, feel, and perform over time.
Here’s the hard truth: even a premium product can fail if what’s underneath is uneven, soft, or moisture-compromised. Over time, movement below the surface often shows up as squeaks, bouncy spots, plank separation, lip-page along seams, or cracked grout lines. Many product warranties also assume the subfloor met required conditions—meaning poor prep can turn into expensive rework later.
What “subfloor prep” actually includes
Subfloor prep isn’t one thing; it’s a set of corrective steps chosen after assessing your home’s structure, humidity, and existing floor. Common tasks include:
- Leveling low spots so planks don’t flex and tile doesn’t rock or crack.
- Grinding high spots on concrete slabs to meet flatness tolerances.
- Securing loose panels (often with screws) to eliminate movement and squeaks.
- Replacing water-damaged or delaminated sections so fasteners and adhesives hold properly.
- Moisture testing and mitigation to reduce cupping, mold risk, and adhesive failure.
Pro tip: Ask your installer what flatness standard they’re working to for your specific product. Many floating floors require the subfloor to be flat within a narrow tolerance (often a few millimeters across several feet). That requirement is about performance, not perfection—and it’s measurable.
Why transitions and height changes affect prep
Small height differences between rooms can create big decisions. Switching from carpet (with padding) to a rigid floor often changes the finished height, which can impact door swing clearance, stair noses, and transitions at hallways. Even when you’re using the same product throughout, different subfloor types (plywood in one area, slab in another) can require different prep approaches.
Key takeaway
The most “beautiful” floor is still a surface installed over structure. Put budget and time toward subfloor flatness, soundness, and moisture control first—you’ll feel the difference every day and you’ll reduce the chances of callbacks later.
2) “Hidden costs” are usually about removal, disposal, and repairs
When people get surprised by pricing, it’s rarely because the product itself changed. It’s typically because the quote they had in mind didn’t include the un-glamorous parts of the job: removing old floors, hauling and disposal, adhesive scraping, trim work, and whatever gets discovered after demolition.
Think of floor replacement like an iceberg. The visible portion is the new surface. The larger portion is the labor and materials required to make that surface installable, durable, and cleanly finished.

Cost buckets most homeowners don’t itemize (but should)
To avoid budget surprises, ask for the estimate to be broken into categories. Common “hidden” cost drivers include:
- Removal and disposal (carpet and pad are usually easier; glued-down floors, tile, or multiple layers take more time and tools).
- Heavy debris fees (tile, mortar beds, and concrete underlayments add weight quickly).
- Adhesive/mastic residue that must be scraped or ground down for a flat install surface.
- Subfloor repair (pet stains, minor rot, delamination, loose panels, cracks in slab).
- Trim and finish carpentry (baseboards, quarter round, shoe molding, door casing adjustments).
- Transitions and stair parts (reducers, T-moldings, stair noses, edge profiles).
Why trim and doors matter more than you’d expect
A clean-looking install isn’t only about straight lines—it’s about the edges. Many floors require expansion gaps, and those gaps must be covered with trim details that look intentional. Additionally, door clearances can change when you go from thick carpet to a thinner hard surface (or vice versa). Trimming doors, adjusting thresholds, and reworking baseboards can add time and materials, especially in older homes where nothing is perfectly square.
Ask for this in writing
A scope that explicitly includes removal, disposal, prep method, underlayment, transitions, trim plan, and cleanup. If it’s not in the scope, it’s easy for it to become a “surprise” later.
Budget smarter, not bigger
Set aside 10–20% as a contingency for prep and repair. Many projects don’t use it all—but if demolition reveals issues, you’ll be glad it’s there.
If you’re comparing quotes, compare scopes—not just totals. Two estimates can look far apart simply because one includes disposal, trim, and subfloor leveling, while the other assumes the home is “ready to install.”
3) Your timeline depends on curing, acclimation, and the rooms you can’t use
“How long will it take?” is a fair question—and it’s also the one that causes the most frustration when people expect a simple answer. Flooring timelines aren’t just about installation speed. They’re about acclimation, cure times, and room access constraints that affect how quickly you can move back in.
Acclimation: the step that prevents future gaps and buckling
Many materials need time in your home before installation so they can adjust to the indoor environment. This matters because homes vary by HVAC use, seasonal humidity, and whether windows and doors seal tightly. Acclimation can help reduce issues like:
- Seasonal gapping between boards
- Edge curl or cupping
- Expansion-related buckling in tight areas
Acclimation is not a one-size-fits-all rule. It depends on the product type, manufacturer requirements, and current jobsite conditions. A professional will match the acclimation plan to those requirements rather than relying on generic timelines.
Curing: why “installed” doesn’t always mean “ready”
If your project uses adhesives, leveling compounds, grout, or finishes, the work may be done—but the floor may not be ready for normal use. Cure time can dictate when you can:
- Walk on it with regular shoes
- Move furniture back without denting or shifting the material
- Roll appliances (especially in kitchens and laundry rooms)
- Wet mop or use certain cleaners
Room complexity changes everything
Open living areas tend to move faster than tight, detail-heavy spaces. Kitchens, bathrooms, and laundry rooms often take longer because of:
- Precise cuts around cabinets, toilets, and supply lines
- Moisture-resistant membranes or underlayments
- Transitions at doorways and thresholds
- Multiple floor heights meeting in one area
Key takeaway
A realistic schedule includes (1) material acclimation, (2) prep and leveling, (3) install, and (4) cure time before full use. The “best” timeline is the one that protects performance and avoids rework—not the one that rushes the chemistry or the structure.
Make your home install-friendly: pets, kids, and furniture staging
Even the best crew can lose hours if the site isn’t ready. A simple staging plan helps keep the project moving:
- Identify a storage zone (garage, pods, spare room) for furniture rotation.
- Create a temporary walkway so you can access essentials without stepping into active work areas.
- Plan for pets (noise, doors open/closed, adhesives) so everyone stays safe.
- Decide appliance handling in advance—especially refrigerator, washer/dryer, and range.
4) The best flooring choice is about your lifestyle, not trends
Flooring trends come and go: extra-wide planks, ultra-matte finishes, high-contrast grout, or a particular color tone everyone seems to have. But your satisfaction comes from how a floor behaves on a normal Tuesday—not how it looks in a staged photo.
A “best” floor is the one that matches how you live: traffic patterns, pets, spills, sunlight, cleaning habits, and noise tolerance. If you choose purely on aesthetics, you can end up with a surface that feels high-maintenance or fragile.
Match the floor to traffic, scratch risk, and comfort
Ask yourself practical questions:
- Do you have large dogs with nails that click and scratch?
- Do kids play on the floor (comfort and warmth matter)?
- Do you wear shoes indoors (grit accelerates wear)?
- Do you move chairs often (consider glide pads and surface hardness)?
High-traffic households often do better with durable, easy-clean surfaces that hide wear and resist dents. Quieter rooms may prioritize softness underfoot and sound absorption.
Moisture-prone spaces need more than “water-resistant” marketing
Kitchens, entries, baths, and laundry rooms are where small mistakes become big problems. Moisture protection isn’t just the product label—it’s the system:
- Underlayment or membrane that’s appropriate for the substrate and room use
- Edge and seam strategy (where applicable) to reduce seepage into vulnerable layers
- Transition planning to prevent water from migrating between rooms
- Sealant/caulk details in the right places without trapping moisture where it needs to escape
Noise control is real—especially in multi-story homes
Hard surfaces can amplify footfall and echo. If you’ve ever heard “stomping” from an upstairs room, you’ve experienced how much underlayment and installation method matter. In multi-story homes, the right underlayment can improve comfort and reduce noise transfer, and it can also make the floor feel more solid underfoot.
Decision lens: When you’re choosing between two products you like, pick the one that best fits your real-world conditions (pets, sunlight, moisture, noise). Trends are optional; performance isn’t.
5) A great finish comes from the small details most people overlook
The difference between “new floors” and “professionally finished floors” is usually found at the edges: transitions, trims, stair noses, and expansion strategy. These details protect the floor where it’s most vulnerable and make the whole project look intentional.
Transitions aren’t just cosmetic—they’re protection
Transitions do three important jobs:
- Manage height changes between rooms to reduce trip hazards.
- Protect exposed edges at doorways and material changes.
- Allow movement where floating floors need expansion space.
If you skip or “improvise” transitions, you often see chipping, edge lifting, or awkward thresholds later. A well-chosen transition profile makes the floor feel continuous, not chopped up.
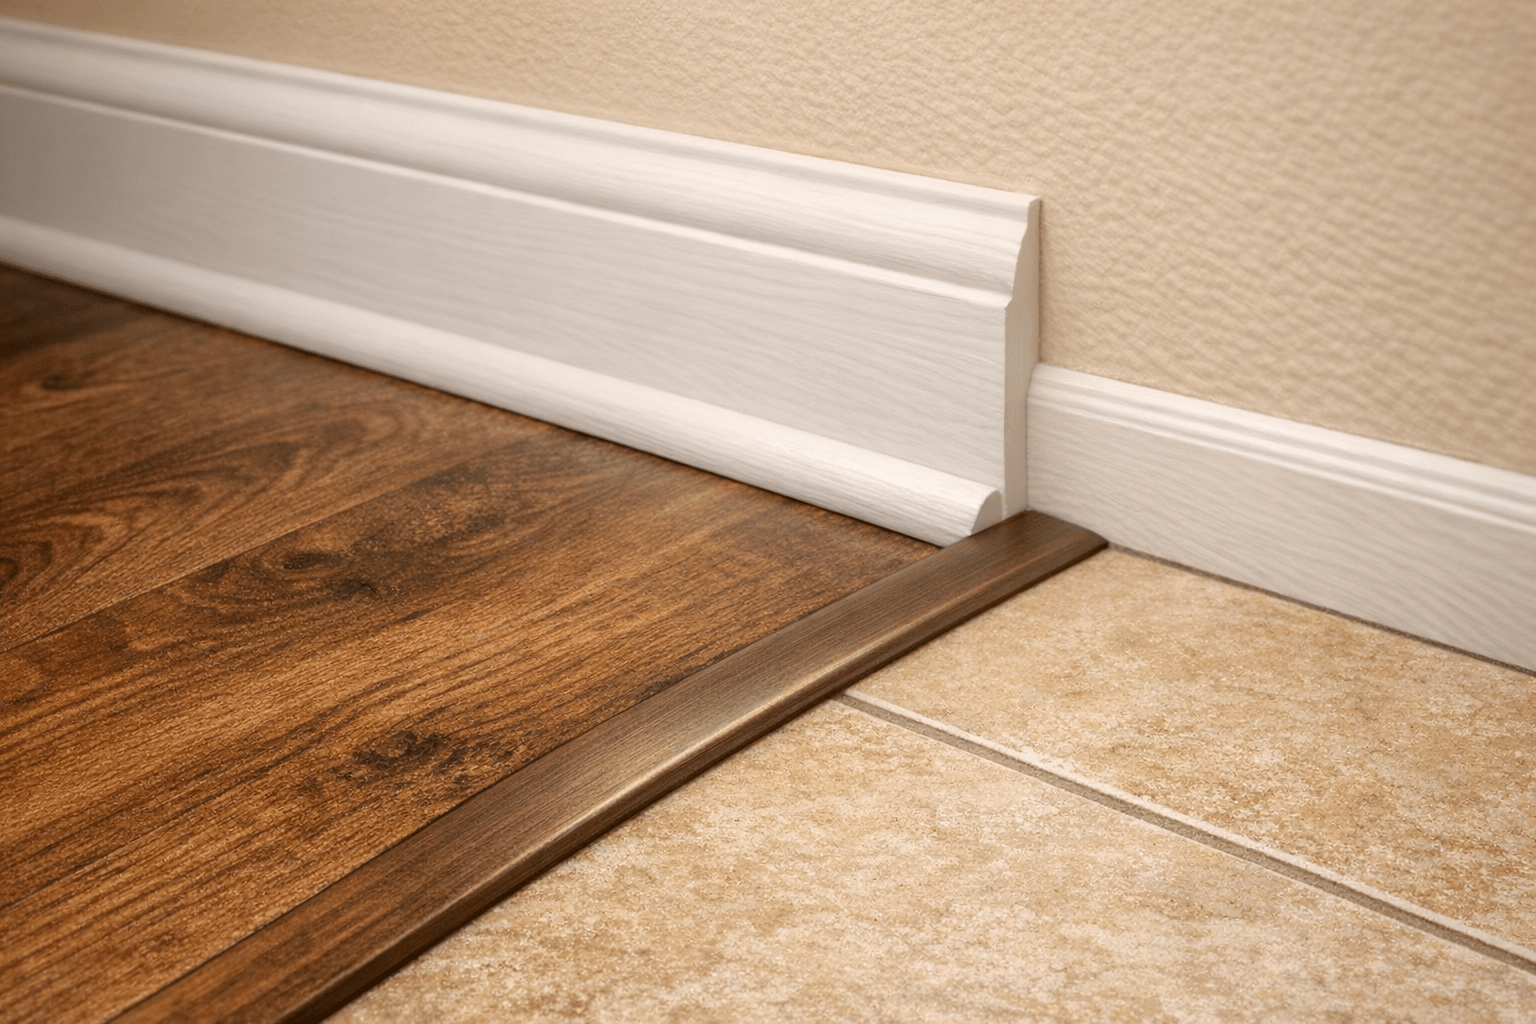
Expansion gaps and trim strategy: the clean-look formula
Many hard-surface floors require expansion gaps around walls and fixed objects. Those gaps let the floor move naturally with seasonal changes. The trim plan determines whether the room looks crisp or cluttered:
- Baseboards off and reinstalled can create a sleek look with fewer extra moldings.
- Quarter round or shoe molding can be a practical solution if baseboards stay in place, but it should be consistent and cleanly finished.
- Door casing undercuts help planks slide neatly underneath instead of leaving visible notches.
Underlayment and moisture barrier choices affect comfort and stability
Underlayment is not just a “checkbox.” It can influence:
- Sound reduction and footfall feel
- Minor subfloor smoothing (not a substitute for leveling, but helpful in some systems)
- Moisture management—especially over concrete slabs
- Locking system longevity by reducing stress from micro-movement
Key takeaway
Finish details are where durability and aesthetics meet. Transitions, expansion planning, and the right underlayment protect your investment and help the floor look “built-in,” not “dropped in.”
Post-install care: small habits that prevent big headaches
Your floor’s long-term appearance is often determined in the first few weeks after installation. Smart, low-effort habits include:
- Felt pads on chair and table legs to reduce scratches and dents.
- Correct cleaners (avoid harsh chemicals or “shine” products that leave residue).
- Entry mats to trap grit that acts like sandpaper.
- Humidity awareness—extreme swings can stress many flooring systems.
Quick checklist before you replace your floors
Use this as a practical pre-project punch list. It’s designed to prevent the most common miscommunications and “we didn’t plan for that” moments.
- Measure accurately and note transitions, stairs, and doorways so materials, trims, and cut plans are correct from the start.
- Decide the trim strategy (baseboards off/on, quarter round, door casing undercuts), because it affects the schedule and final appearance.
- Confirm who moves furniture and appliances, and plan a temporary path through the home while rooms are out of service.
- Ask for a written scope including removal, disposal, subfloor prep, underlayment, transitions, and cleanup—so expectations are clear.
A few questions worth asking your installer
How will you verify subfloor flatness and moisture before installation?
You’re looking for clear standards (flatness tolerances) and a plan (testing method, mitigation steps if readings are high). This protects both performance and warranty compliance.
What’s included in removal and disposal, and what could change after demo?
Demo reveals reality. A good answer outlines what’s included, the process for documenting unexpected repairs, and how change orders are handled.
What rooms will be out of service, and for how long?
This is where acclimation and cure time show up. Knowing room access constraints helps you plan pets, kids, cooking, and furniture staging.
Conclusion: Replace floors like a pro (even if you’re not one)
The best flooring projects don’t just look great on day one—they stay quiet, stable, and easy to live with for years. That outcome is usually driven by the unglamorous parts of the job: subfloor prep, realistic budgeting for removal and repairs, scheduling that accounts for acclimation and curing, and finish details like transitions and trim.
If you take only a few actions from this guide, make them these: (1) insist on subfloor checks, (2) compare estimates by scope, not just totals, and (3) plan your home logistics so installation can move without preventable delays. Those steps protect your investment and your peace of mind.
Ready to replace your floors with confidence?
Call us today at 469-340-0837 or request your no cost consultation to get a clear plan for materials, prep, and installation.